tech
ResExp: Buying High End Kicks Is High Tech
The most obvious observation of buying high end kicks aka #coppingkicks is how high tech it is. Software bots, monitors, quick tasks, cloud-based servers, virtual machines, VPN, proxies, and more are just some of the tech you’ll need to be familiar with if you want the high end. It’s amazing to see what tools are readily available to assist with #coppingkicks.

Need a full blown Windows Data Center server? Head to Google’s Cloud Platform and spin one up in seconds. Now you have a remote server to launch your bot assault. Oh wait, you need proxies to differentiate your origin? Scripts are available to create proxies by the masses. Delete when done (or banned) and go again. It’s unreal.
But all of this comes with a cost that should make you think twice about wanting to cop kicks at the high end. All of that mentioned above will cost you. Software bots can range from a few hundred to a thousand dollars and most have periodic renewal subscriptions to keep them active. But a good bot works even better when it knows when to get to work, so you’ll need to pay for a monitor. While you can create your own proxy servers using established tech like Squid, you can also rent them as needed. All set? Not quite. With all this infrastructure, some shoe sites like Nike require valid user accounts to make purchases. After signing up all eligible family members, you have like what, 3 or 4 verified Nike accounts? People can buy verified accounts by the dozen. Configure your bot to send tasks to various proxies using different accounts, and now you’re ready to buy the trendiest out there. Except that there are many, many more with this same exact setup and even better. So after this investment, there’s still no guarantee of #coppingkicks.
Just on a personal sidetrack, it seems like slot providers are the most economical route for personal pairs of shoes. Someone with all the tech sells a “slot” for a shoe release. If the bot for that slot successfully makes a purchase then the shoe is yours after paying a fee to the slot provider for this success. Pay After Success (PAS) fees vary depending on the shoe but can be $75-$200. But if you compare the cost of the bot software, proxies, and accounts, and doing it yourself, that PAS fee is reasonable. You won’t make any personal profit, but you probably have a better chance of landing that shoe you coveted.
So my takeaway from #coppingkicks is to stay away unless you’re willing to spend the time and money to educate and digitally arm yourself.
Deleting Bulk Email from Gmail
With thousands of unread email in Gmail, it was time to clean house. But just how do you select more than one screen worth of email at a time in Gmail?

As a product from Google, I should have known better – you use search. Yup, in the Gmail search bar, you do something like this:
older_than:1y
After the search is done, you can select all those emails using that checkbox above the email tabs then mass delete them.
Trying Out Orbi’s Mesh Network

Walking the lanes of Costco, I noticed a new pack of Netgear’s Orbi wireless networking devices. Instead of the three-unit pack I had seen previously, Costco carries a two pack (one base and one satellite), and the cost is good, right under $200. While a single Wifi router has been working in my household, speeds have been down and coverage was sufficient.
So far so good with this Orbi setup. Speeds (as measured by Speedtest) have been very good, and configuration was easy (a little too easy). Compared to other NetGear products, configuration of the gear seems too simple. Where’s all the “advanced” settings that I’m used to seeing? I can’t even assign IP addresses to specific devices. The settings must be there, I just gotta do some research. I think the Orbi is a keeper.
My SmartThings Experiment Is Done
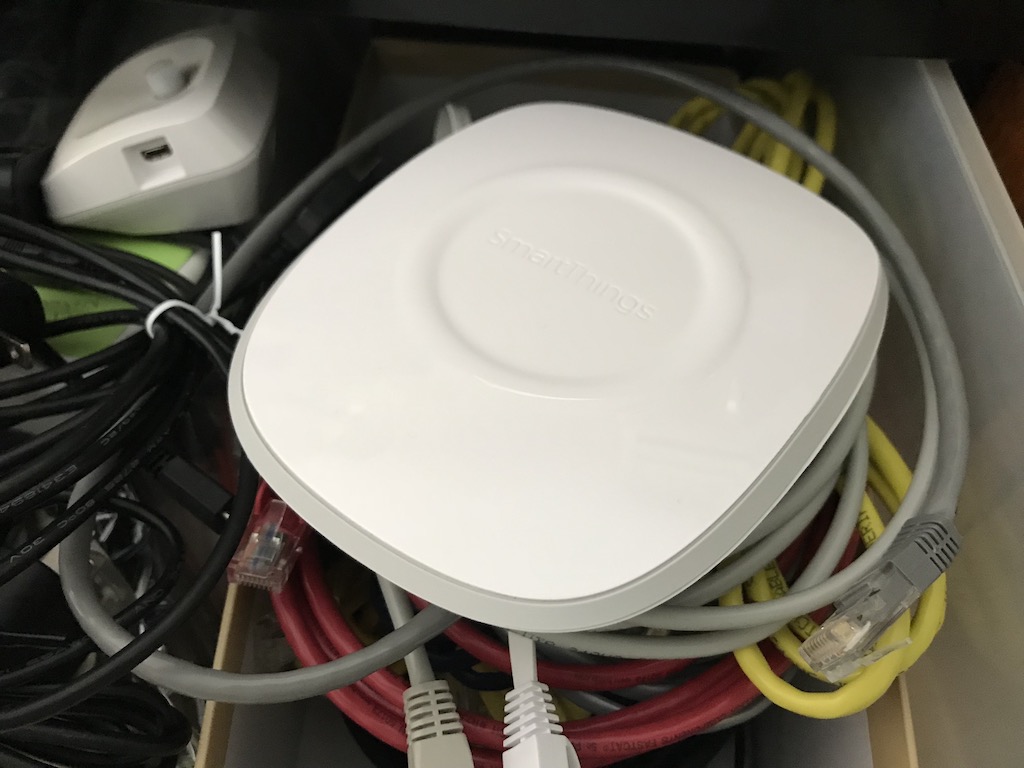
I was an early adopter of SmartThings from its Kickstarter days, but my forray into SmartThings is done. My Gen 1 base unit still works but pretty much every accessory I own has stopped behaving. One motion sensor stopped responding a long time ago and the second sensor had been working then stopped. My on-off switch was reliable until one of the countless updates made it unreliable. Sometimes it would work according to my programmed schedule, often times it didn’t.
With all the UI changes in the app, I had a hard time figuring out where everything went. How do I stop the blinking light on the on-off switch? I had found it a long ways back but since an update, I can’t find the setting anymore.
During the days, I would get a notification that my base unit was offline, and I’m not sure why. Was my home Internet down? Who knows, but with all this aggravation and minimal benefit, it was just easier to unplug all the SmartThings and say good bye.

Apple TV and Netflix – No Audio
Not exactly sure what happened, but the Netflix app on the 4th generation Apple TV (non 4K) stopped playing audio. I have a feeling there was an update to the Netflix app and the update is implementing digital copy protection. Maybe this could be related to the future inclusion of Dolby Atmos in the 4K version of the Apple TV???
I do have an external receiver connected to a sound bar and speakers. The Apple TV is connected to the TV via HDMI, and I use the optical out of the TV to feed the receiver. All this time, this setup has worked out. As an interim solution, I changed the sound settings of the Apple TV to stereo. It’s good enough for now, but I have a feeling more changes are coming when and if my AV setup is complete. My current (non-HDMI) Dolby surround receiver won’t be able to handle the protected signals so will eventually need replacing.
But I have read up on HDMI ARC (Audio Return Channel) to see if this will fix things.
Moving at 128kbps
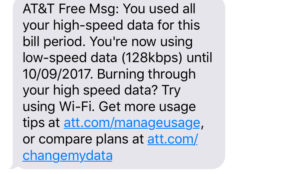
During my last AT&T billing cycle, I exceeded my shared data plan limit and got this warning.

Luckily, my plan has no overage costs (like before), but mobility at 128kbps (G2-speeds) would be unbearable right?
Well, it wasn’t that bad. It was sufferable but tolerable. Of course, jumping onto available wifi was the first priority but otherwise data at 128kbps was doable for a short duration. Instead of upping my data plan up a tier, I’m gonna try another month and see what happens. I’ve tuned my phone to perform less checks and updates while using mobile data, and personally, I’ve been cutting back on frivolous use of my phone when bored.
Dozy iOS 11?
Anyone else experience a “very sleepy” iPhone after installing iOS 11? I’ve encountered at least three times that my iPhone 7 doesn’t want to wake up right away. It’s usually after I put my phone to sleep then try to wake it immediately. The screen stays black. I know the iPhone is still on since the home button still provides haptic feedback (the “button” doesn’t do anything when the iPhone is off).
After a long delay, the iPhone wakes up but in the meantime, the dozy iPhone feels like it’s not working.
Configure an Old Apple AirPort Express
Still got a working Apple AirPort Express and want to configure it using a newer macOS such as 10.12 aka Sierra? Follow these helpful instructions.
The biggest gotcha is joining the correct wifi network name. For me, my reset AirPort Express was advertising a network of “Apple Network”. But if you follow steps 6 and 7, you have to change the name to “Apple Network” and append the last 6 characters of the AirPortID to “Apple Network” so it looks something like “Apple Network 1a2b3c”. Once that’s done, your Mac should be talking with the AirPort Express.
Now fire up the AirPort Utility 5.6.1 Launcher (skip the update notification) and you should see your AirPort Express available for configuration. Made a mistake? Reset the AirPort Express and start over.
On a related note, the original 802.11g version of the AirPort Express does not support bridge (aka client) mode according to Apple.
DisplayPort 1.2, MacBook Pro 2016, Dell Ultrasharp U2515H, MST
So it looks like my “new” MacBook Pro 2016 with TouchBar and Radeon Pro 460 with 4 MB does not support DisplayPort Multi-Stream Transport (MST). MST allows the daisy chaining of supported monitors.
I got a USB-C to DisplayPort cable from Amazon and connected it to my first Dell UltraSharp U2515H.
The display finally mirrored my MBP, but I had to move USB-C ports seemingly to “wake up” the monitor or MBP. Then I activated the DP1.2 mode on the U2515H since by default DP1.1a is the factory setting.
Then I connnected the video out of the first UltraSharp to the video in of the second UltraSharp. For this, I used the Dell-provided DisplayPort to mini-Display Port cable. I then activated DP1.2 on the mDP port on the second monitor (not sure if I had to do this but thought it made sense).
The second UltraSharp came to life and displayed a mirror of the first UltraSharp. My laptop screen showed one desktop while both UltraSharps displayed a second (mirrored) desktop. The MBP recognized one external monitor, not both.
I also tried using a DP-to-DP cable to interconnect the two DP1.2-compatible monitors together, but that didn’t change the results (yes, I activated DP1.2 for the monitor’s DisplayPort). My MBP is running macOS Sierra 10.12.5.
Now the Dell manual states that only a single external display with resolution of 2560×1440/60Hz is supported by MST, and that’s the native resolution of the Delll UltraSharp U2515H. So there’s that. I tried reducing the resolution of the Ultrasharps seeing if that had any effect, but nope.
So either MST isn’t supported/implemented in the Mac OS X software or Mac hardware or I need to try this again using monitors with lower resolutions. Or most likely, I need to forget MST and go the old fashion route of using two video connections to two monitors.
WordPress 4.7 Broke My Login
Aw boo, upgrading to the latest WordPress 4.7 Vaughan accidentally broke my ability to login. Instead, I was caught in a loop where WP wanted to update the database but couldn’t. No matter what, the site kept wanting to update the database, but couldn’t, never getting past that point. Googling this problem shows others have encountered the same behavior.
I found very useful troubleshooting tips in this article, namely deactivating themes and plugins. For me, it seemed the theme was the culprit. Still trying to sort it all out. 🙁
Fighting with macOS Optimized Storage
I’ve been fighting with the new macOS Optimized Storage feature today. I accidentally enabled this feature while trying to free up space on my drive. Optimized Storage does make it easy to see what’s taking up all the space and then free up that space.
But then you end up with this Purgeable space that isn’t living up to its name. See that cross hatched section? That’s the purgeable space weighing in at 104 GB. The actual free space is that blank section at 32 GB.

I’m trying to restore a Time Machine backup of a virtual machine, and that single file is roughly 55 GB. But when I start the restore, my Mac complains that 23 GB of space is needed to complete the restoral. Doing the math, 32+23=55 GB makes sense, but there’s all that purgeable space that can easily cover the additionally needed space. So what’s up with that?
I’m trying to see if I can deactive Sierra’s Optimized Storage which I’m hoping deactivates the Purgeable space, immediately making it free space.